VICKERS HARDNESS
Therefore, the indentation is square shaped. The more significant the indentation is, the more the indenter has gone into the material and the less hard the material is. The two diagonals d1 and d2 of this square are measured using an optical device. The value d is obtained by computing the average of d1 and d2. Such value d will be used for the calculation of the hardness. The strength and duration of the support are also standardised.
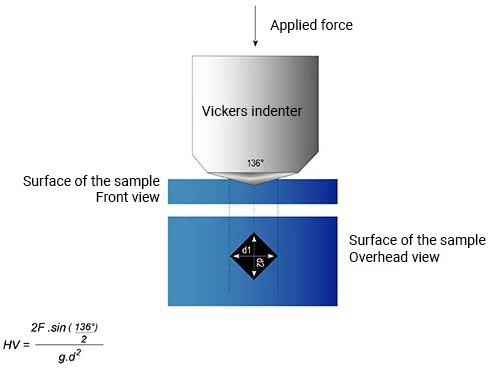
F = the applied force (N)
d = the average of the two diagonals (mm)
g = the gravitational acceleration (ms-2) ≈ 9.81
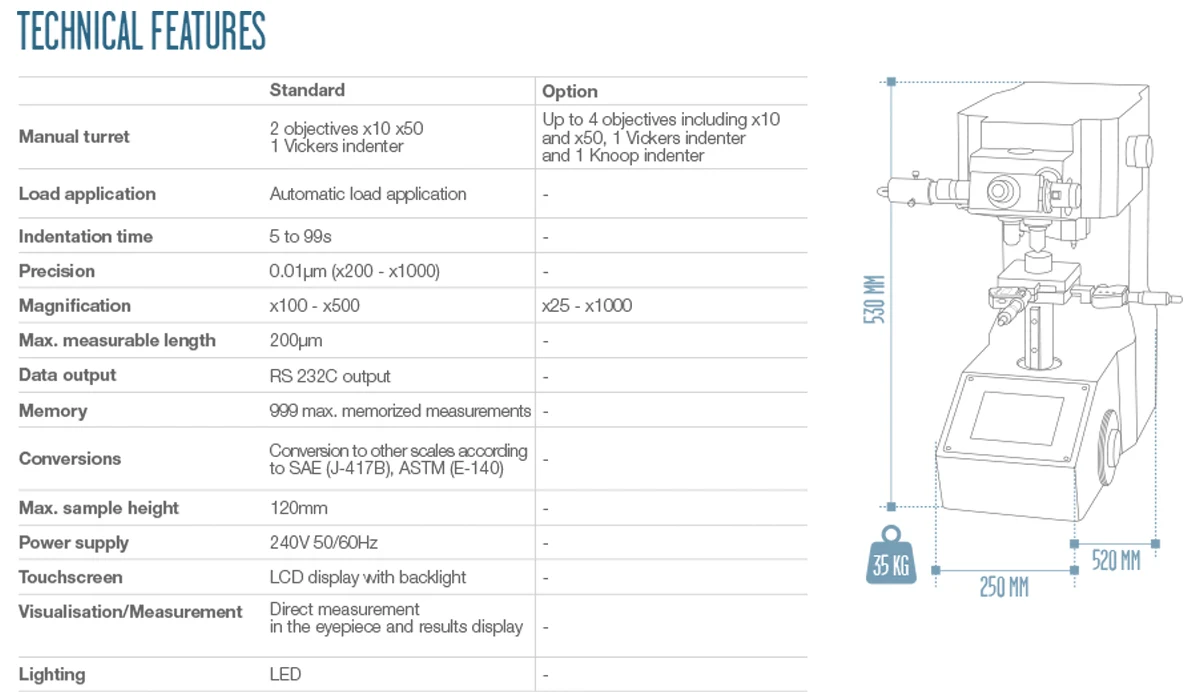
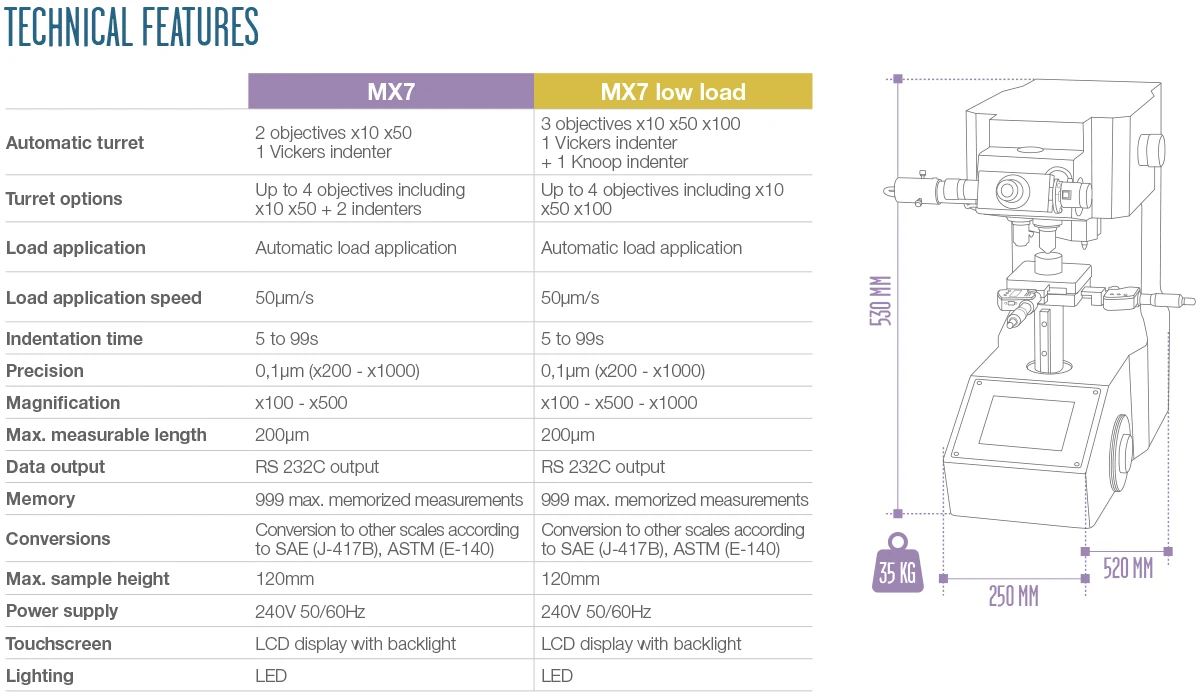
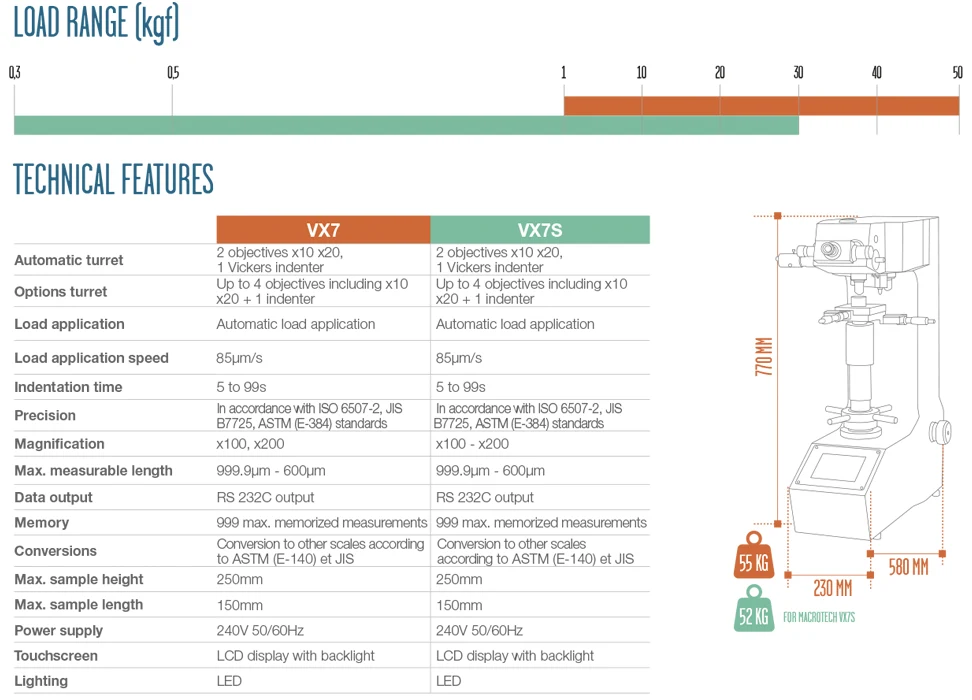
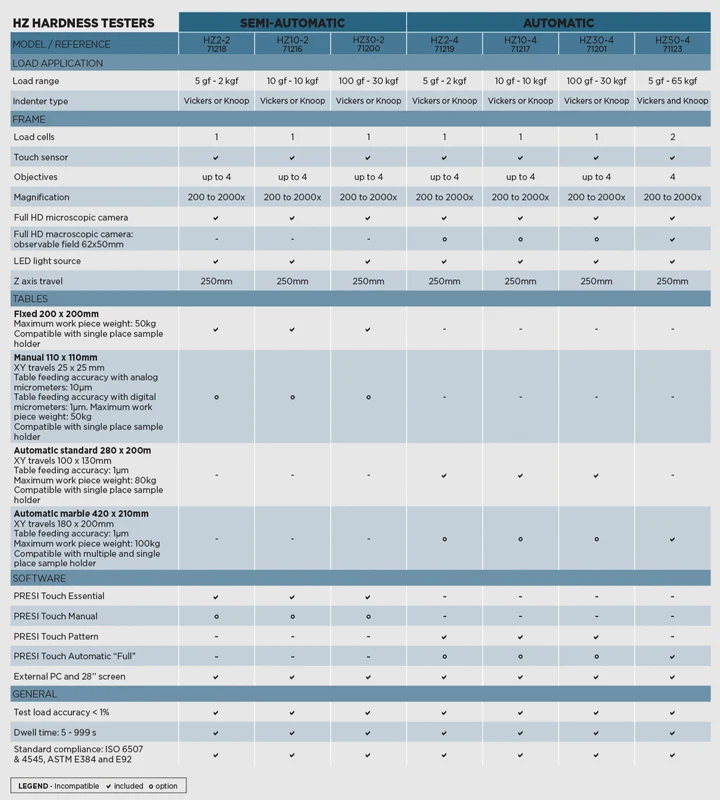
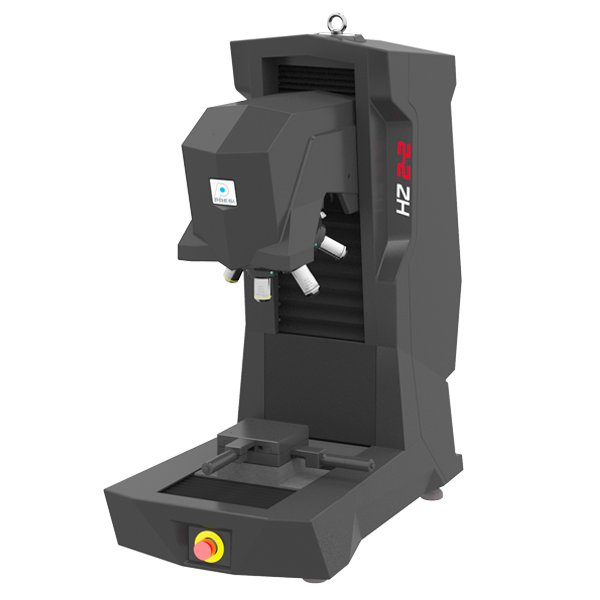
PRESI offers a range of Vickers Hardness Testers and accessories that facilitate hardness/micro-hardness testing. Our range is differentiated between the mechanical weight range (the Matzuzawa Microtech and Macrotech Hardness Testers) and the load cell range (the HZ Hardness Testers).


